
How to Create Graphics With Canva
Do you need an image for your blog that you just can’t find online? Or do you want to design a flyer, a poster, or a graphic from scratch? But you’re not a professional designer and trying to navigate a complicated (and expensive) program like Photoshop drives you nuts?
Simply create your own graphics with the online design tool Canva. Canva makes it easy for non-designers to create great images. We personally have been using Canva for over 2 years now. Here’s a step-by-step tutorial to get you on your way to use Canva to create your blog and social media images!
Benefits of using Canva:
- Pre-sized social media templates.
- Designer type templates get your graphics started.
- Loads of size and shape options.
- Use free stock images or pay $1 per use for premium photos.
- Saves your images to be edited or downloaded later.
- It’s easy to make multiple, similar graphics from a template.
Step 1: Sign up with Google, email or Facebook
Open Canva in a new window.
This is a super quick step. Signing up and having your own account makes you able to save your projects and come back to them later. Very useful if you need to change something or don’t have time to finish it in one go.
You can choose to try the Canva Pro or choose the Canva Basic. I suggest going with basic for now to understand what this tool can do. Click on Try Canva Pro.

You can choose to signup with your Google account which makes it easier. You will get a confirmation email regardless. You can then choose to try Canva Pro or You can click on Skip Canva Pro for now in the top right corner and you can always try this later. At any point during signup, if you are presented an offer, you can always skip ahead.

This is how it looks as of now when you choose a Canva basic account.

Step 2: Choose a design and size type

Choose what size type you want to create: poster, social media, presentation, Facebook post, blog graphic, A4, card or determine your own size by clicking on “more”.
In this lesson, we’re gonna choose “Blog Graphic”.
Step 3: Choose a template
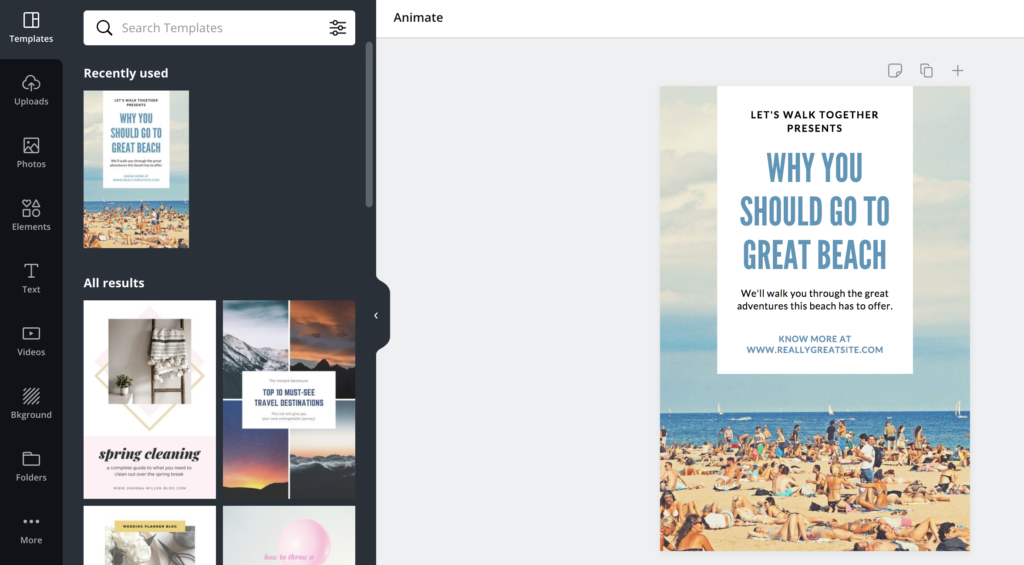
Canva gives you many beautiful templates to start with. The picture above shows a layout template for a blog post title graphic to be used as a featured image for your blog post.
This picture shows a layout template for a blog graphic to be used anywhere in your post.
You can adjust your layout however you like in the next couple of steps.
Step 4: Choose the background

Click the “backgrounds” tab at the far left. Then click to adjust the background color to any solid color that you need or choose from a pattern under the color palette. Most patterns are free.
You can create any color you like by clicking on the + sign under document colors. You can also colorize the patterns.
If you want a photo instead of a color, check out the photos in the “background” section. Many photos(200,000) are included for free in the basic account and their pro account has more than 60 million stock photos. When you drag one of them into your layout, it will say “Canva” spread across the background.
You can also upload your own photo for free by clicking on the “uploads” tab below on the far left. After you’ve uploaded your photo, it will be shown in the “background” section. Click on it and drag it to your layout. Size to fit by clicking and dragging a corner.
Step 5: Adjust the color and transparency of separate sections

If you want to adjust the color of your header or some other part of the layout, click on the section in your layout, and then on the little box in the left corner of your layout window.

Want to make the color or layer transparent? Select a section in your layout and then click on the transparency box in the far right of the top of the layout window to adjust transparency.
Step 6: Change layer position
Next to the transparency box you see the word “arrange”. When you’ve selected a section in your layout and then click on “arrange” you can bring that layer forward or send it back.
Step 7: Insert text

You can insert your own text in two ways.
- Double-click on the text in your layout. The arrow turns into a cursor. Type in anything that you want.
- Click on “text” on the far left of your screen (above “background”). You can see there are text boxes with formatting and without. Choose the type you want and drag the text box to your layout and insert what you want to say.
A menu bar pops up on the top of your layout screen where you can change the font, size and color of the text.
Step 8: Insert elements

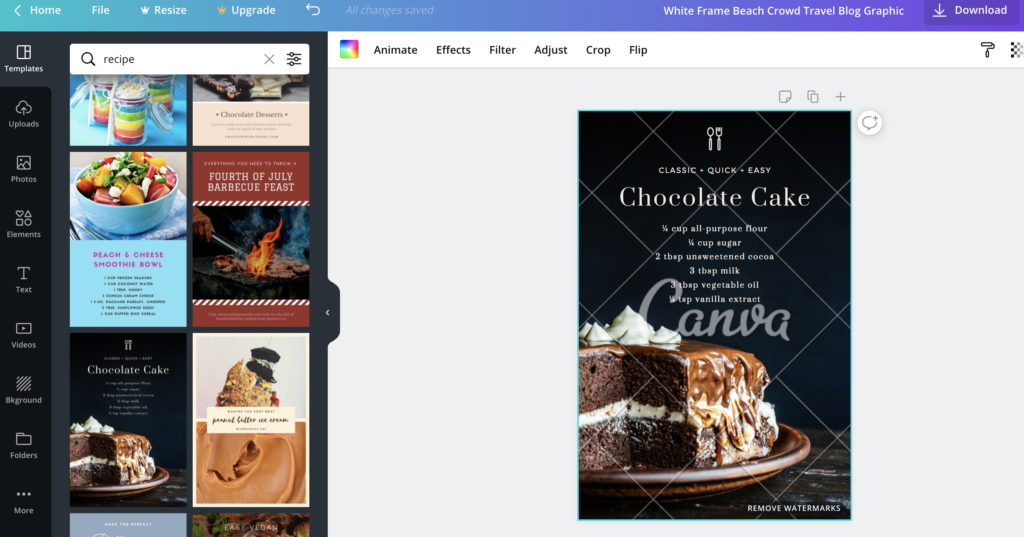
If you want to insert an element in your layout, click on the “elements” section in the far left of your screen (above “text”). You can choose from photos, grids, frames, shapes, lines, illustrations, icons and charts.
When you click on the first option “free photos”, Canva shows you the free photos they have to offer. You can always upload your own photo as well, but if you’re looking for a specific photo you can also click on “search 1,000,000 images” on the top of the elements screen. Type in what you’re looking for and Canva shows you all the photos related to your search word. Some are free, and for the rest you need to pay $1.
Drag anything you want into your layout and size to fit by clicking and dragging a corner.
Step 9: Adding your URL
If you’ve created a blog graphic or social media image, take a moment to consider branding. Add your website name or URL at the bottom of the image.
Step 10: Finish and save

If you want to make more graphics in the same style, you can copy your page to make another with different text or images in it.
When you’ve finished your design, click on “download” on the far right of the top of your screen and choose “JPG” or “PNG” for web use or “PDF – Print” for printing.
Enjoy!